Open Excel for the first time and the screen can feel like a lot: a green ribbon up top, a grid that never ends, and a handful of small boxes and buttons whose names aren’t obvious. Once you know what each region is called and what it does, though, the interface stops feeling crowded and starts feeling like a toolkit.
This guide breaks down every part of the Excel 365 (2026) window, in the order you’d naturally scan the screen — top to bottom, left to right — with a labeled diagram and a free downloadable PDF you can keep as a quick reference.
The Labeled Diagram
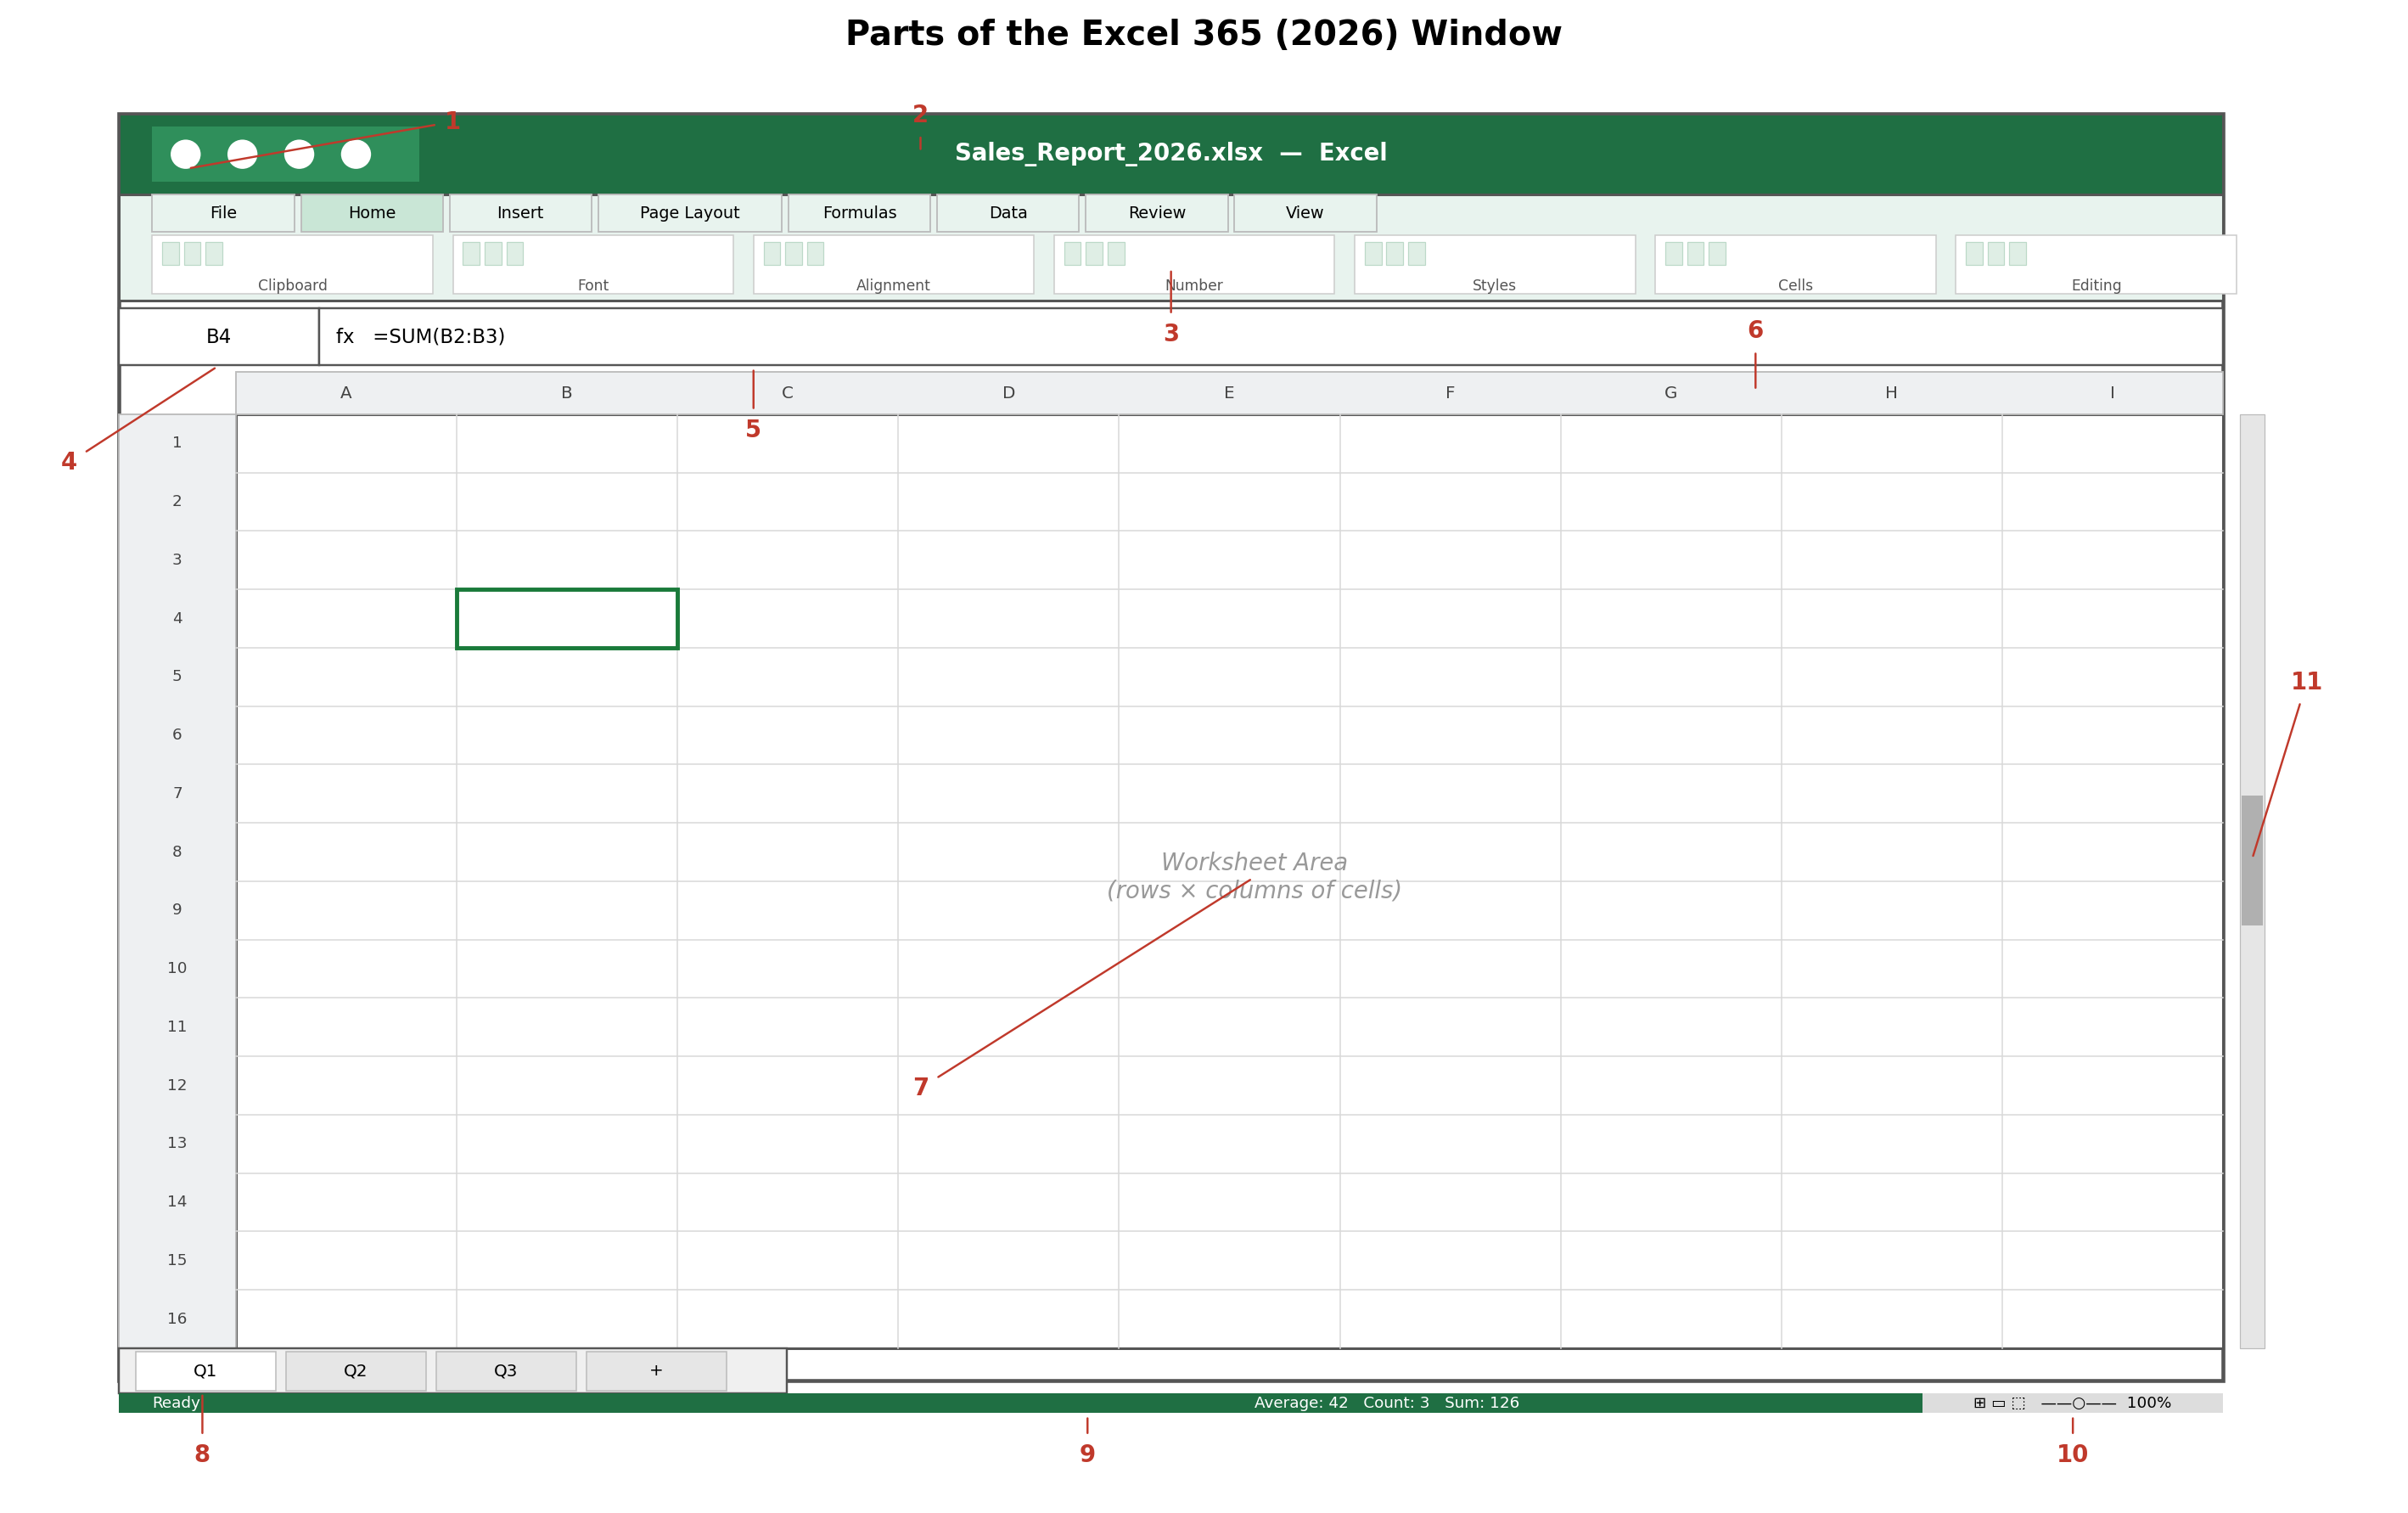
The image below numbers all 11 core parts of the Excel window. Each number is explained in detail in the sections that follow.
[Labeled diagram of the Excel 365 window — Figure 1]
The 11 Parts of the Excel Window, Explained
1. Quick Access Toolbar (QAT)
A small, customizable strip of one-click shortcuts — Save, Undo, Redo by default — that sits above or beside the Ribbon and stays visible no matter which tab you’re on. You can add your own most-used commands to it by right-clicking almost any button in Excel and choosing “Add to Quick Access Toolbar.”
2. Title Bar
Runs across the very top of the window. It shows the current file name, the app name, and, in Excel 365, the Microsoft account you’re signed in with. It’s mainly useful for confirming you’re working in the right file.
3. Ribbon
The tabbed command center — Home, Insert, Page Layout, Formulas, Data, Review, View — where nearly every Excel feature lives. Each tab is broken into labeled groups (Font, Alignment, Number, Styles, and so on), and switching tabs only changes which tools are visible; it never changes your data.
4. Name Box
Sits to the left of the Formula Bar and shows the address of whichever cell is currently selected — for example, B4. Type any cell reference or a named range into it and press Enter to jump straight there, which is faster than scrolling on a large sheet.
5. Formula Bar
Displays and lets you edit the actual contents of the active cell — text, a number, or a formula. It’s especially useful for long formulas, since you can see and edit the full expression here even when the cell itself is too narrow to show it.
6. Column Headers
The row of letters (A, B, C…) running across the top of the grid. Click a letter to select the whole column, or drag the border between two letters to resize a column’s width.
7. Worksheet Area
The main grid of rows and columns — the actual spreadsheet. This is where you enter data, build formulas, and apply formatting. Everything else in the window exists to help you work in this space more efficiently.
8. Sheet Tabs
Found at the bottom-left of the window. Each tab represents one worksheet inside your workbook, and clicking the “+” button next to them adds a new sheet. Right-clicking a tab gives you options to rename, move, copy, or color-code it.
9. Status Bar
The strip along the very bottom of the window. On the left, it shows your current mode (Ready, Edit, or Enter). On the right, it automatically calculates the Sum, Average, and Count of whatever range of cells you have selected — a fast way to sanity-check numbers without writing a formula.
10. View Buttons + Zoom Control
Located at the bottom-right corner. The three small view buttons switch between Normal, Page Layout, and Page Break Preview, while the slider next to them zooms the worksheet in or out.
11. Scroll Bars
The vertical and horizontal bars along the right and bottom edges of the worksheet area, used to navigate around large spreadsheets that extend beyond what fits on screen.
Quick Reference Table
| # | Part | What It Does |
|---|---|---|
| 1 | Quick Access Toolbar | One-click shortcuts, always visible |
| 2 | Title Bar | Shows file name and account |
| 3 | Ribbon | Tabbed command center for every feature |
| 4 | Name Box | Shows/jumps to the active cell address |
| 5 | Formula Bar | Displays and edits cell content |
| 6 | Column Headers | Select and resize columns |
| 7 | Worksheet Area | The grid where data lives |
| 8 | Sheet Tabs | Switch between worksheets |
| 9 | Status Bar | Mode indicator + quick Sum/Average/Count |
| 10 | View Buttons + Zoom | Change layout view and zoom level |
| 11 | Scroll Bars | Navigate large worksheets |
Download the Free PDF
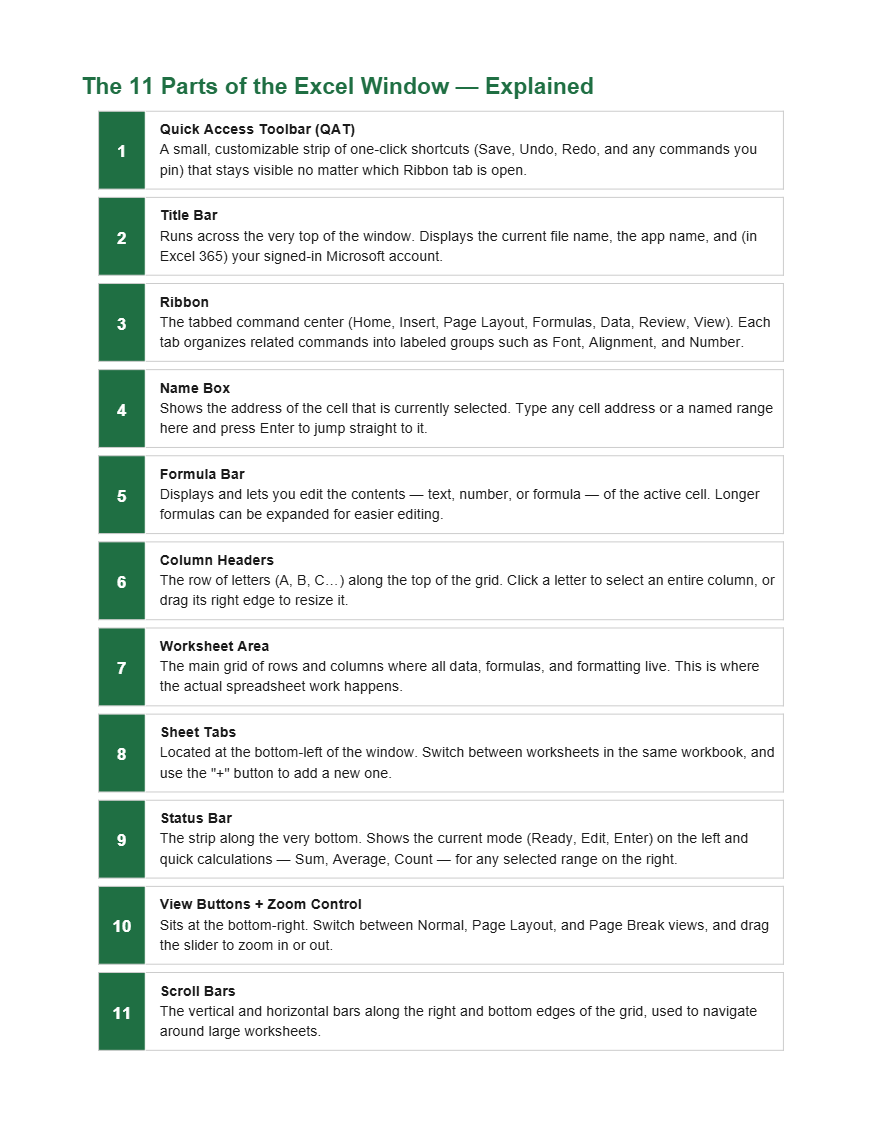
Prefer a printable version to keep at your desk or share with a class? The free PDF below includes the same labeled diagram plus the full explanation for each part on one clean reference sheet.
[📄 Download: Parts of Excel Window 2026 — Free PDF Guide]
Frequently Asked Questions
How many parts does the Excel window have?
Most guides count 10 to 11 core parts: the Title Bar, Quick Access Toolbar, Ribbon, Name Box, Formula Bar, column/row headers, Worksheet Area, Sheet Tabs, Status Bar, View Buttons, and Scroll Bars. Some tutorials split these slightly differently or add the File tab as its own item.
What is the difference between the Name Box and the Formula Bar?
The Name Box shows and lets you navigate to a cell address (like B4). The Formula Bar shows and lets you edit that cell’s content — its text, number, or formula.
Where is the Ribbon in Excel 365?
It’s the tabbed toolbar directly below the Title Bar, containing tabs like Home, Insert, and Formulas. Each tab groups related commands — for example, everything under Font and Alignment lives in the Home tab.
What does the Status Bar show by default?
By default, it shows the current mode on the left (Ready, Edit, or Enter) and, whenever you select a range of numeric cells, quick calculations — typically Average, Count, and Sum — on the right.
Can I customize the Quick Access Toolbar?
Yes. Right-click any command in the Ribbon and select “Add to Quick Access Toolbar,” or click the small dropdown arrow at the end of the QAT to add and remove commands.